How to Change Screen Timeout on iPhone

Your iPhone is set to auto-lock after 30 seconds, but you might want something else. Here’s how to change screen timeout on iPhone.
The time it takes for your phone to lock automatically is available via its screen timeout settings. By default, your iPhone is set to timeout after 30 seconds. However, you might want more time to pass before your iPhone screen locks.
It can be frustrating when your phone is constantly locking while trying to get things done. The auto-lock feature can be especially irksome when you hand off your phone to a friend or colleague.
If you want to change this setting, learn how to change screen timeout on your iPhone below.
How to Change Screen Timeout on iPhone
Changing the screen timeout on an iPhone comes in handy in many scenarios. For example, you may be working on a spreadsheet, watching a video, or listening to a podcast. When your screen keeps locking every 30 seconds, it interferes with what you need to do.
Whatever the reason you need to change the screen timeout value on your iPhone, we’ll walk you through the process.
To change screen timeout on an iPhone:
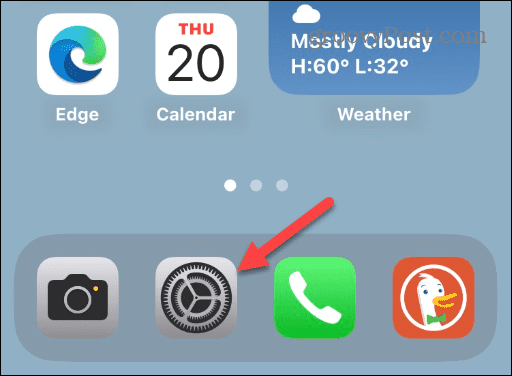
- Grab your iPhone (or iPad) and tap the Settings icon on the home screen.


- When the Settings app opens, scroll down and tap the Display & Brightness option.


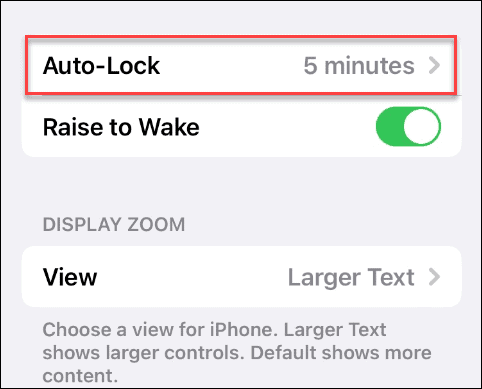
- Now, tap Auto-Lock from the list—it should be set to 30 seconds by default.


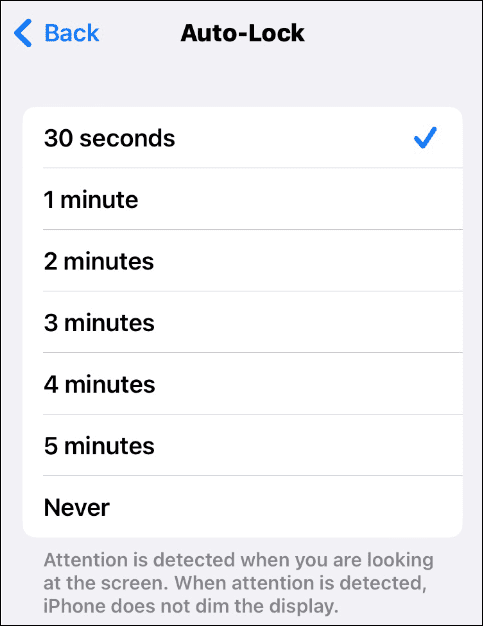
- You can now select the time you want before the screen locks. You can choose from the default 30 seconds or up to five minutes.
- In addition, you can choose Never to keep the iPhone or iPad screen awake the entire time it’s being used.


- Once you make your selection, tap the Back button, and the screen timeout on your iPhone will change to the value you selected.


Note: Changing Screen Timeout affects the auto-lock on your iOS device. However, your device will still lock like normal when you press the power button.
Screen Timeout on iPhone
The screen timeout feature automatically turns off your iPhone or iPad, and the device locks after some time of inactivity. The feature does two things: securing your device and saving battery life.
If you want to increase or decrease the screen timeout value, it’s a straightforward process, and you can change it whenever you want. The process is the same on iPhone, iPad, and even iPod Touch.
Keep in mind that if you set your screen timeout to a higher value or never, it will have an effect on battery life. Namely, it will drain the battery at a faster rate. So, the good thing is that you can temporarily set screen timeout for longer. After you have completed your task, you go back into settings and decrease the screen timeout time.
For security’s sake, you’ll want to use screen timeout judiciously. If you set it to five minutes or never, anyone nearby can access your private data on your phone. So, the main thing to remember here is to set it back to 30 seconds after completing your tasks. That ensures the private data on your phone remains secure.
Getting More from iPhone
In addition to adjusting the screen timeout values, there are other things you can do to ensure you’re getting the most from your iPhone. For example, if you’re a heavy texter, you may want to learn to recover deleted messages or mark messages as unread on your iPhone. If you’re going to keep your texts cleaned up, check out how to make your iPhone automatically delete old messages.
You might consider adding widgets to the lock screen if you have a modern iPhone with iOS 16 or higher. Another feature you may be interested in is scheduling emails via the Mail app.
A rare but very real SIM card problem that you may run into is the last line no longer available error. The good news is you can fix “Last Line No Longer Available” on your iPhone pretty quickly.
Leave a Reply
Leave a Reply
