How to Make Text Curve in PowerPoint

If you want to make your presentations more impressive, you can shape your text. Learn how to make text curve in PowerPoint.
We’ve all sat through a dull PowerPoint presentation that’s full of uninspiring slides being read out by an uninspiring presenter. It doesn’t have to be that way, however. PowerPoint is packed with tools to help you create truly impressive presentations (although it can’t do anything about the presenter). One way you can make your presentations more impressive is to add some curved text to your slides. Curved text is more eye-catching, and you can use it to fit around objects or images in your slides for an even more stylish effect.
If you want to make your slideshow presentations more creative, then here’s how to make text curve in PowerPoint.
How to Make Text Curve in PowerPoint Using the Warp Options
There are some pre-set options you can use in PowerPoint to curve your text. Using one of these options is the quickest way to create the style of curved text that you want. You can combine it with a stylish font to make your presentations really pop.
To Make Text Curve in PowerPoint Using the Warp Options
- Click the Insert menu.

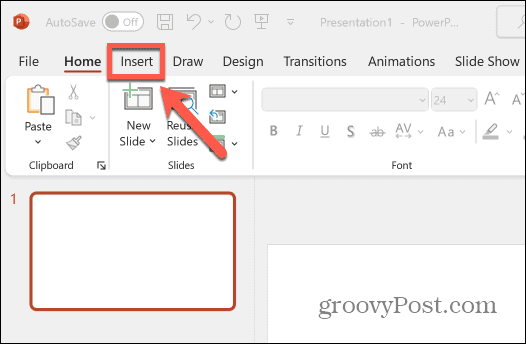
- Select Text Box from the ribbon.

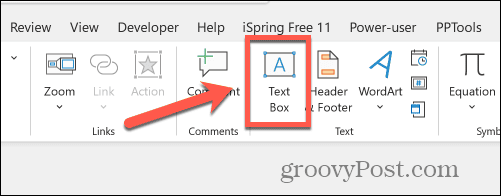
- Drag out the text box in your document.
- Enter the text that you want to curve in the text box.
- Click the Shape Format menu.

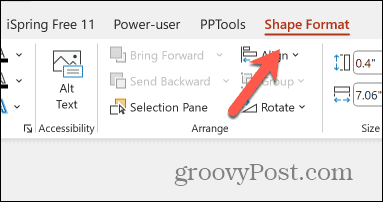
- In the Word Art Styles section of the ribbon, click the Text Effects icon.

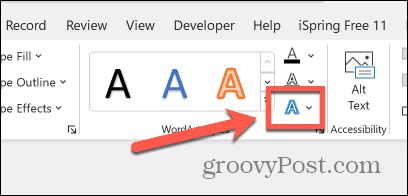
- Select Transform.

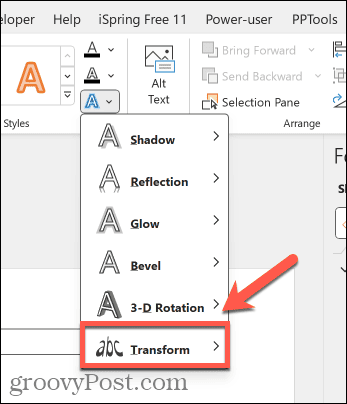
- Choose one of the Warp options.

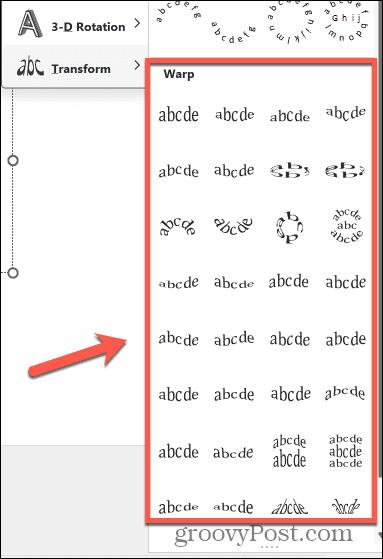
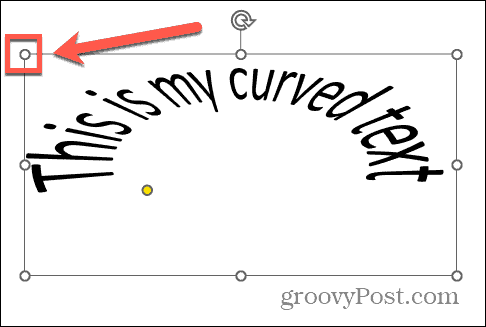
- The effect is applied to your text.
- To resize your text box, drag the White Dots around the border.

- To edit the curved text, click and hold the Yellow Dot on the border around the text.

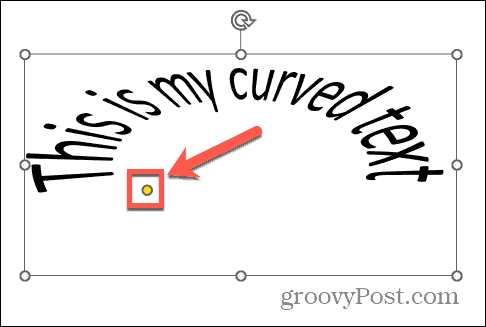
- Move the dot to change the curvature of your text.
- When you’re happy, click anywhere outside your text box to deselect it.


How to Make Text Curve in PowerPoint Using the Follow Path Options
If you want more control over the curved text in your PowerPoint, you can use the Follow Path options to get your text to follow a specific path. The curved text will automatically fit the size of your text box, but you can adjust the size of your text box or the size of your text to get the effect that you want.
To Make Text Curve in PowerPoint Using the Follow Path Options
- Click Insert.


- In the ribbon, click the Text Box button.


- Drag out a text box in your document.
- Enter your text and select it.
- Click the Shape Format menu.


- Click the Text Effects icon in the ribbon.


- Select Transform.


- Select one of the Follow Path options.

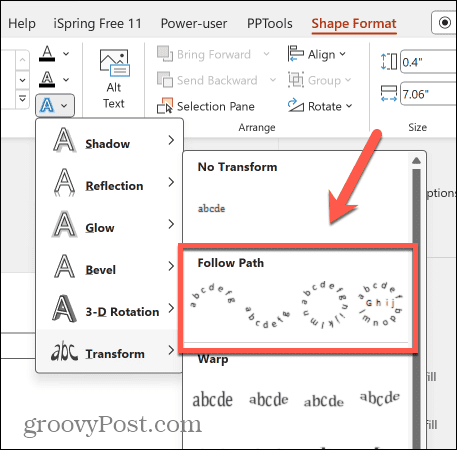
- The effect will be applied to your text.
- Click on the White Dots around the border of the text box to resize the text box that constrains your curved text.

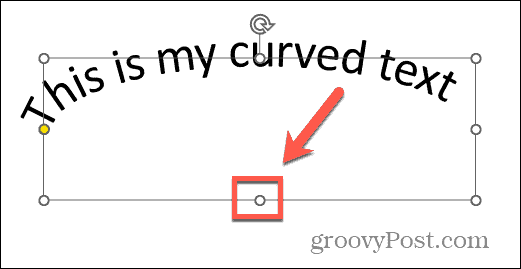
- You can add additional text or change the size of the font to create the shape that you want.
- To edit the path that the curved text follows, click the Yellow Dot on the frame around the text.


- Drag the dot to change the text path.
- When you’re done, click outside the text box to deselect it.


How to Remove Curved Text in PowerPoint
If you decide you no longer need curved text in your PowerPoint document, you can remove the effect and return your text to being straight. You may want to remove any animations you’ve added to the text, too.
To Remove Curved Text in PowerPoint
- Select your curved text.
- Click the Shape Format menu.


- Click the Text Effects icon in the ribbon.


- Select Transform.


- Click the option under No Transform.

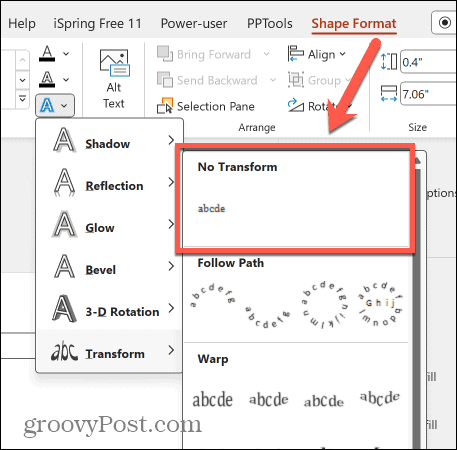
- Your text will now return to being a straight line of text.


Get Creative With PowerPoint
Learning how to make text curve in PowerPoint allows you to create more unusual presentations that really catch the eye. You can get creative and use curved text around objects or images in your presentation, or even animate your curved text for some impressive effects.
There are plenty of other ways to get more creative when creating your PowerPoint presentations. One of the most impressive is to use the Morph transition in PowerPoint. This allows you to morph smoothly from one shape to another as you progress through your presentation. With a bit of skill, you can make some truly jaw-dropping animations that make your PowerPoint presentation really stand out. Try combining the Morph transition with curved text to make your presentation even more interesting.
Leave a Reply
Leave a Reply


