How to Enable and Disable Silent Mode on iPhone

Need to keep your iPhone quiet? You might want to use silent mode, which blocks all sounds and vibrations. This guide will show you how to use it.
In an important meeting? It’s important to block out any interruptions while you’re working, and turning down the volume on your iPhone might not be enough.
You don’t want to shut down your iPhone, either. Thankfully, the iPhone comes with a built-in switch that allows you to quickly enable or disable silent mode on your iPhone. You can also manage this setting from your phone by changing a few settings.
If you’re in silent mode, you won’t hear any ringing, alarms, vibrations, or other types of alerts from your iPhone. If you want to know how to use it, here’s what you’ll need to do to enable or disable silent mode on an iPhone.
Using the Ring/Silent Switch on an iPhone
The easiest way to put your iPhone in silent mode is by using the Ring/Silent switch. If you’re new to iPhone, you might not know it’s there. It lets you easily slide your iPhone in and out of silent mode.
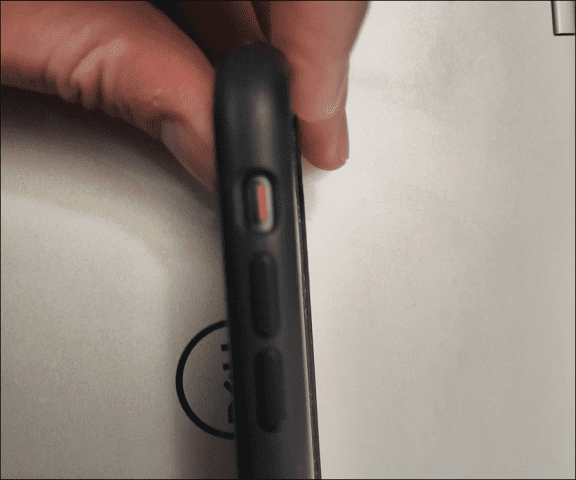
You can find the Ring/Silent switch on the left side of your iPhone. Flicking the switch one way or another will enable or disable silent mode.
Note: You should be able to flip it on or off using your thumbnail. If you’re having a hard time, try a paperclip.
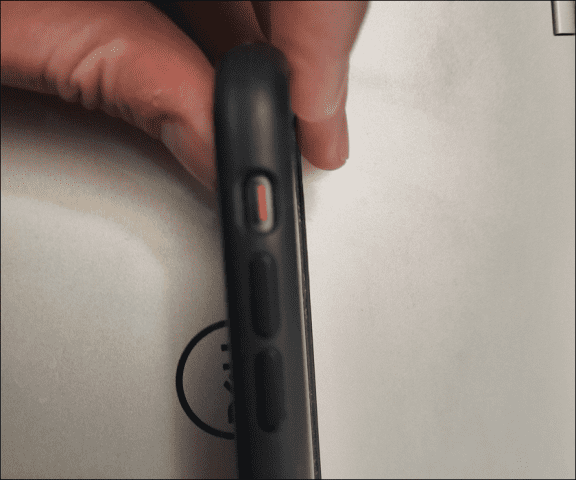
When silent mode is enabled, you’ll see a red-orange color on the switch (shown below). When you disable silent mode, you no longer see the orange color.
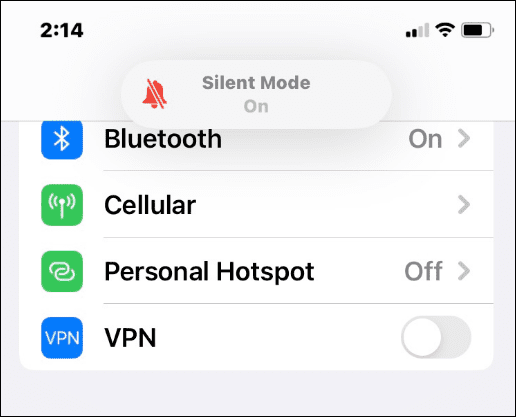
Another visual cue you’ll see on your screen. When silent mode is enabled, a small message will appear at the top of your screen to notify you.

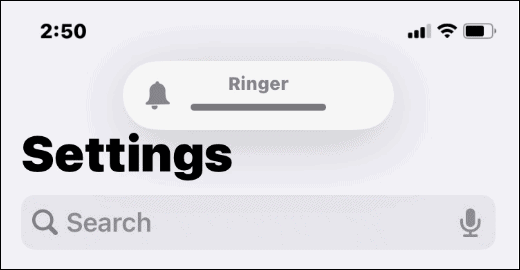
When silent mode is disabled, you’ll see a Ringer notification message at the top to alert you that your iPhone’s sound is enabled.

How to Turn Off Silent Mode on iPhone
Need to quickly turn off silent mode on your iPhone? If you need a quick refresher, this is how you do it.
To turn off silent mode on an iPhone, flick the physical Ring/Silent switch so that the orange label isn’t visible. This will immediately turn silent mode off, restoring your volume and vibration levels to your usual settings.
If you want to enable silent mode again, simply flick the switch back so that the orange label is visible.
How to Enable or Disable Silent Mode on iPhone via Settings
You can also enable and disable silent mode on your iPhone by accessing the device’s settings menu. This is a good option if you physically can’t flip the switch. It also works if the switch breaks off or doesn’t function properly.
To enable and disable silent mode on iPhone via Settings, use these steps:
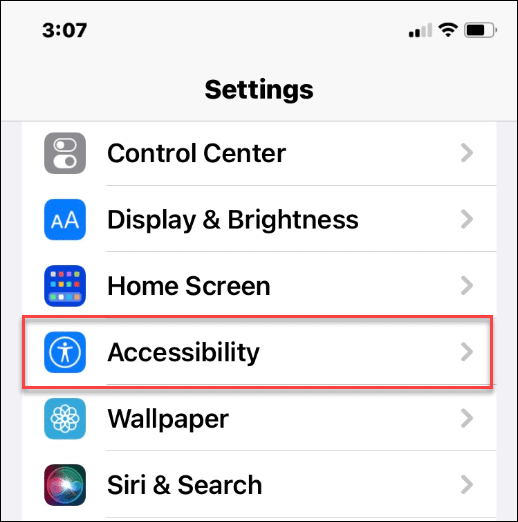
- Open Settings and tap the Accessibility option.

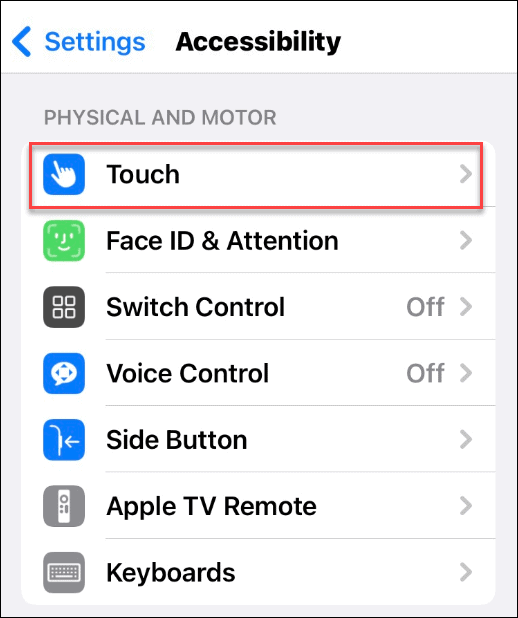
- Under the Physical and Motor section, tap Touch.

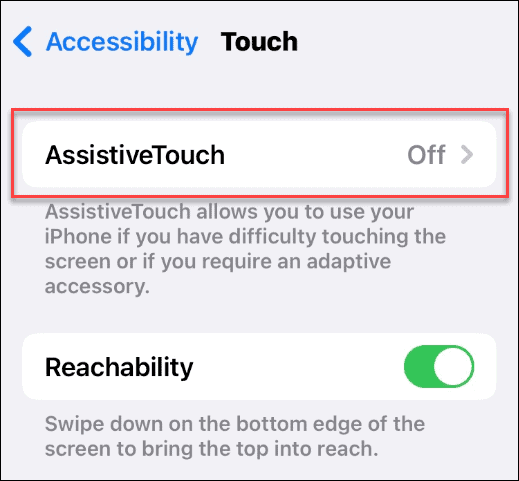
- In the Touch menu, tap the AssistiveTouch option.

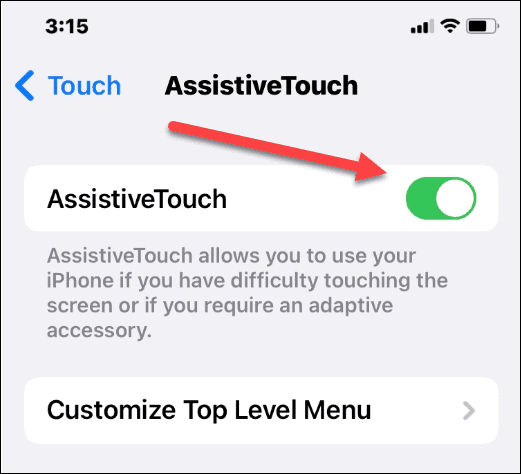
- Toggle the AssistiveTouch switch to enable the feature.

- Once AssistiveTouch is enabled, tap the small gray circle off to the right side of the screen.
- It will display a gray box with different options—tap Device from the box.

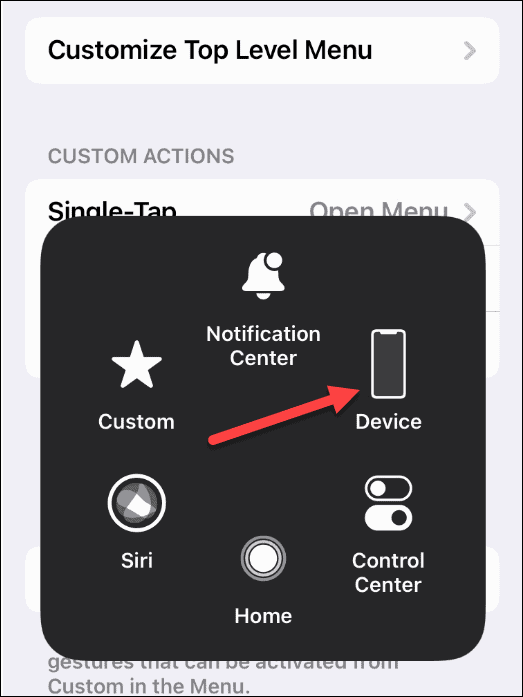
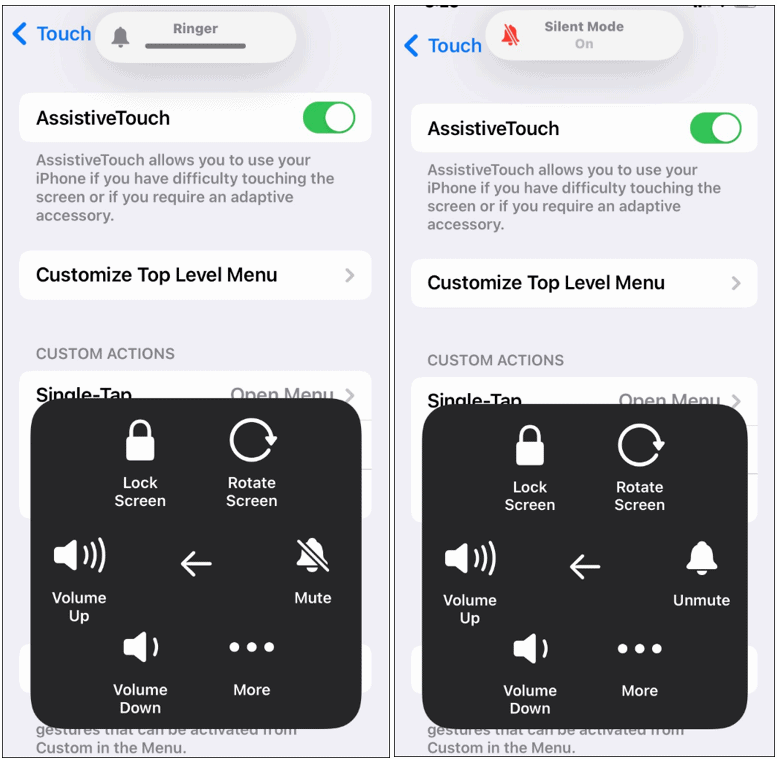
- Now you can tap the Mute/Unmute button to enable and disable silent mode.
- When you Mute, it enables Silent Mode on your iPhone. When you Unmute, it disables Silent Mode on your iPhone.

More iPhone Tips & Tricks
Whether you’re at a doctor’s appointment, in an important meeting, or want to be respectful of others at the movie theater, your iPhone has you covered, thanks to silent mode. Using the physical switch is simple enough, but you might want to access it from the phone’s screen.
Either method works—just follow the steps above to enable or disable silent mode on your iPhone. Want to quickly access your other settings? You may want to start using the Control Center.
For more on how to use your iPhone, check out how to draw on a photo or take long-exposure photos.
Leave a Reply
Leave a Reply


